


Every parent strives for their child to have beautiful and understandable handwriting. Copybooks come to the rescue. The notebooks for written work contain calligraphic samples of letters, syllables, and numbers. They help children learn proper writing by outlining the principles and basics of calligraphy. Adults also resort to copybooks. With regular practice, they correct sloppy handwriting.
Copybooks

Adults rarely write by hand, often only when absolutely necessary. Writing has been replaced by computer text. This is convenient, but the handwriting of adults deteriorates due to lack of training. Children in schools and kindergartens are taught to write correctly and beautifully, regularly consolidate the skill, train their hand and learn to write using special aids at home.
The simplest copybooks are made independently; they are suitable for children 2 years old and 3 years old. You need to take a notebook in a box and draw simple shapes with dotted lines: lines, squares, triangles. And the kids, with the help of their parents or on their own, will trace the figures. Examples for beginners are presented below. There are copybook templates in pdf, word and other formats on the web.
For preschoolers


Children 3 – 4 years old


45 years


5 – 6 years


For the preparatory group


By points


Patterns: sticks - hooks


For 1st grade


For 2nd grade


Mathematics


Classic


For adults


The printed alphabet is simpler than the written alphabet because the letters are not connected to each other. Such educational notebooks are suitable for kindergarten, when children are just being introduced to the alphabet. Copy-book coloring books will introduce your child to the alphabet in a playful way when he colors a picture starting with a certain letter. For example: a watermelon, when we are talking about the letter “A” or a hippopotamus, when we are talking about the letter “B”.
When learning the printed alphabet, the child should explain what vowels and consonants there are, how hissing sounds differ from voiced sounds, hard from soft.


Calligraphy letters

The capital alphabet is studied before school. These are complex characters where the spelling of capital letters is different from lowercase letters. In this case, it is important to connect the symbols correctly. Parents and teachers use modern types of school notebooks or copybooks from Soviet times.
Adults and children of high school age can use wide-lined copybooks; for children, narrow-lined notebooks are used. You can print out a copybook with all the letters on one sheet - this will help you quickly remember the sequence of letters in the alphabet.


How to write numbers

Mathematical symbols are easier to write because there are significantly fewer of them: only 10 numbers versus 33 letters of the alphabet, and the numbers are not connected to each other. For copybooks, checkered notebooks are used, where each number is clearly limited and does not go beyond the limits.
School copybooks with numbers are equipped with shading, arrows and other signs that help you understand at what point the symbol begins and the writing algorithm. Printouts with examples of numbers are used for teaching both preschoolers and school-age children.


Handwriting Workbooks

Teachers and educators recommend purchasing special notebooks designed to prepare your hand for writing. The best copybooks were developed and created by domestic teachers, which include the Nekin simulator, working copybooks by Bortnikova, Zhukova, Kolesnikova. The manuals are designed for children of different ages.
Bortnikova

Zhukova

Kolesnikova

Nekina

How to prepare your hand for writing

To prepare the hands of future first-graders, teachers have compiled a list of special tasks.
Regular exercises train fine motor skills in children of any age:
- Finger games will help prepare your hand, but you should not give priority to only one hand, regardless of whether the child is right-handed or left-handed. The limbs should be equally used.
- Coloring pages are a fun pastime that develops your creative imagination and gets your fingers ready to write.
- Special notebooks for future schoolchildren. The authors suggest tracing pictures or large letters at the dots, drawing lines without lifting the pencil from the paper (labyrinth).
- Copybooks - the first teaching aids are developed for children 4–5 years old, 6–7 years old, for grades 1-2, for grades 3, 4. Copybooks introduce kids to printed and capital letters and syllables. There are also mathematical textbooks with figures and numbers, notebooks in Russian, English, German, French and other languages.
A child of senior preschool age learns from a copybook. They can be purchased at stationery stores, bookstores, or downloaded for free online.
How to fix handwriting

Many people believe that beautiful handwriting is formed at school age, and adults will no longer be able to correct it. In fact, it can be improved regardless of age: both a first-grader and an adult are able to place a hand. However, this is the result of long and regular training.
It is important to follow the rules and take into account the nuances:
- A comfortable place for writing - good lighting is necessary, choose a table with a hard surface, a chair with a back. These conditions are especially important for babies, children 3-6 years old, and primary schoolchildren, but are also recommended for adults.
- When working, you cannot rush; maximum concentration on the process is necessary.
- Suitable stationery. Previously, experts argued that to succeed in calligraphy and develop good handwriting, you need to use a fountain pen. Today, ball-type ones are also allowed, but with a thin rod.
- Educational material - children use copybooks for the appropriate age. They learn to write using dots, hatches or dotted lines. Adults can keep a notebook in a narrow line and practice in it. If desired, download ready-made online copybooks and learn to correctly write combinations of letters, their elements, syllables and sentences.
- Initially, you should write straight and parallel lines, circles and other simple shapes. Then move on to letters and syllables.
- If necessary, turn to calligraphy masters, they will tell you how to write letters and connections that contain errors. They will recommend exercises that improve fine motor skills and handwriting.
Don't expect quick results. Calligraphy will improve with hard and regular practice.
How to learn to write correctly and beautifully

It is easier to teach a schoolchild beautiful handwriting right away than to reteach and correct mistakes later.
Parents of preschoolers and first-graders will benefit from advice from experienced teachers:
- Calligraphic handwriting is impossible without developed finger motor skills. To do this, you need to draw with pencils more often, sculpt from plasticine, do origami, and beadwork. Games with cereals will be interesting and useful for the little ones. To do this, an adult needs to mix a little buckwheat and rice, and the child will sort them out.
- Beautiful handwriting is directly related to straight posture. The baby should not hunch over while he is writing in copybook. The back should be straight; for this, he is seated on a chair with a hard back. However, computer and swivel chairs are not suitable.
- High quality writing pen. It is necessary to select office supplies with a thin rod. When choosing between a gel and a ballpoint pen, the latter is preferred because it does not scratch the paper. The finger grip area should be made of rubber. This handle will not slip in children's hands, unlike its plastic or metal counterpart.
- Handle grip. The correct position in the hand: the pen lies on the middle finger, the thumb and index finger hold it, and the ring and little fingers are pressed against the palm. If you grip incorrectly, you cannot achieve beautiful handwriting.
Following the rules of calligraphy will help your child learn to write letters from A to Z, words, numbers and numbers beautifully.
Preparing this display took us a lot of time. We have tried to collect here all the recipes for preschoolers known to us that have ever been released on the market. Some of them have not been used in educational institutions for a long time, but this does not make them ineffective in teaching children to write.
With the help of letters and numbers, your child will learn the basics of writing and literacy, and will be able to independently write numbers on paper in a square or line.
In mathematics (numbers)
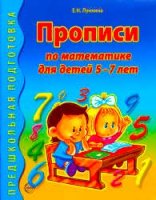
Mathematical copybooks are an indispensable assistant in preparing for school. Practice shows that children whose parents taught them how to write numbers correctly more often become excellent and good students in elementary school.Kolesnikova E.V. for 5-7 years old math by cells
DownloadKolesnikova E.V. for 4-5 years old math steps

Download link
Shevelev K.V. for 6-7 years old mathematical copybooks

Part 1
Part 2
Pererson L.G. and Suvorina E.A. - learning to write numbers for 3-4 years and older
This book is in two parts from famous authors for free download. In the preparatory group of kindergarten it is often used by teachers. It never hurts to practice with your child.
Part 1
Part 2 The manual will teach your child how to spell numbers, which is so necessary for learning mathematics in the 5th grade. It also contains tasks for the development of graphic skills, and for a mathematical bias - geometric shapes.
Nefedova and Uzorova 3000 exercises for preschoolers
This manual contains not only a sample and example of what this kind of manual should look like, but also a full cycle of teaching how to spell numbers. Perhaps these are the best copybooks..Download for free and without registration
Russian language and literacy (letters)
Russian workbook for 5-6 years old, checkered
This literacy guide is intended for children in the senior group of kindergarten. Funny copybooks for children, in which the main character is a duckling, will help teach future first-graders how to write the elements of letters. The entire alphabet in the form of a copybook is in front of us.
Printed and written letters Fedosov N.A. for 5-7 years
These copybooks will teach any child how to write uppercase and lowercase letters. They comply with the Federal State Educational Standard. Designed for use in preschool educational institutions.
Lunkina - preparation for school 5-7 years literacy training
In these copybooks, the author Lunkina teaches children to read and write in an entertaining way. First sticks and hooks, and then the whole alphabet, then letter combinations. And all this with a workbook with tasks.
Buneev R.N., Buneeva E.V., Pronin O.V. by letter
2 parts of a textbook from famous authors for preparing for school. With their help you can learn how to print block letters. We ourselves learn to write letters with their help.
Download and print part 1
Download and print part 2
Developing letters from Nyankovskaya N.N.
Helps to form a graphic representation of letters and their connection. An interesting and educational guide for preschoolers. Most of the book is devoted to hooks, dashes, shading, ticks, and lines. Only then does learning move on to letters.
First and correct! With shading
This manual contains the whole alphabet. 98 pages to learn how to write all the letters of the Russian alphabet. Everything is depicted quite large. A great idea both for preparing for school and for younger preschoolers.
Denisova, Dorozhkin for preparatory group
Literacy lessons for kids from the domestic publishing house of copybooks.
Zhirenko, Kolodyazhnykh - elements of letters, basic writing
An excellent tool for developing writing skills in preschool children.
Vowels and consonants. Author: Zhukova

We did not post the copybooks of the authors Ilyukhina, Kozlova, Vasilyeva, Belykh and Nishcheva, due to the fact that we have already heard stories about complaints from copyright holders about sites where files for downloading are posted. We hope for your understanding and are constantly working to improve the content of the site.
In an oblique ruler
Copybook pictures (templates)
Letters of the Russian alphabet
The letter a

Developing good handwriting in students is one of the main tasks of the school when teaching writing.
To accomplish this task, programs recommend building writing instruction on systematically selected material that is accessible to the students’ age, maintaining consistency in the development of skills in writing letters that make up words, and, through special exercises, eliminating individual deviations and deficiencies that impair the clarity and legibility of writing.
For penmanship classes, one lesson per six-day period is allocated from Russian language lessons. In the first grade in the first half of the year, these classes take place in connection with ABC lessons 3-4 times a six-day period, up to 10 minutes in the first quarter and up to 15 minutes in the second. In the second half of the first grade and in the second grade, penmanship classes are taught twice a six-day week, for which half a lesson is allocated for each lesson from Russian language lessons *.
__________
* Primary School Program, ed. 1935
In the first half of the year, students master writing all lowercase letters: they write letter elements and letters, then words and short sentences.
In the second half of the year, children master writing capital letters, practicing mainly writing names. Capital letters are written in a simple font, like lowercase letters, with the exception of B, E, V, D, R.
In grade II, the work of grade I continues and is consolidated. Students learn to write more quickly (compared to the first year), clearly and beautifully, along two rulers and study the style of capital letters in a generally accepted font. Individual deviations and deficiencies that impair the legibility of writing are eliminated by setting up special exercises for individual students in the form of rewriting entire words, syllables, letters or their elements.
Teaching writing in ink should begin in illiterate classes at the end of September, and in literate classes - from the second week of children’s stay at school. Each student should have a pen made from pieces of flannel or cloth.
In order to cultivate the best attitude of the student towards the notebook, samples of the best children's works should be displayed in the classroom in order to encourage students to have correct, beautiful, clear and even handwriting and to keep the notebook neat.
The proposed copybooks provide the teacher with examples of correct writing, and help the student learn to write correctly using systematically and appropriately selected material. Handwriting material is arranged from easy to difficult. Starting with exercises for the letter K, the material is given in parallel with teaching literacy using the ABC book. This material provides examples of the correct form of letters, the correct combination of letters into words and the correct organization of the page.
Copybooks cater to students of grades I and II, but they can be useful for handwriting correction purposes for students of grades III and IV as well.
For the first grade, the copybooks contain all types of penmanship work in accordance with the program, ed. 1935
For the second class are given:
a) preliminary exercises with the transition to a smaller font;
b) drawing lowercase and uppercase letters, arranged in order of difficulty, as well as words with these letters;
c) a sample lesson on capital letters P and T, revealing the system of work; Other lessons on one or another letter are constructed in a similar way;
d) connected text on various ways of connecting letters in words.
If the teacher finds it necessary to increase the number of exercises for each type of work, then he can do this using specially selected exercises, coordinated with both the tasks of penmanship and spelling.
Each penmanship lesson is structured according to the following plan:
- Setting the goal for today's lesson.
- Preparing notebooks and pens for writing.
- Testing the ability to hold a notebook and pen; monitoring the correct landing.
- The teacher shows words on the board in a written font with the analysis of letters into their constituent elements.
- Analysis of what is written from the point of view of style: where to start and where to end, how to connect one stroke to another, how to connect one letter to another, etc.
- Write one line independently and counting.
Work accounting. During work or at the end of penmanship classes, the teacher looks through the students' notebooks, indicating the general shortcomings and shortcomings of each student, correcting them by writing a sample on the blackboard or in the students' notebooks.
In teaching writing, the teacher’s own writing plays a huge role. Showing here is the best way to learn. That is why the teacher needs to take care of the technical perfection of writing on the board and in the student’s notebook. The teacher's writing should be simple, clear and beautiful, observing normal letter forms, without using any unnecessary or conventional strokes and unnecessary decorations (zigzags, tails, strokes, etc.).
Every teacher, before writing on the board, should become thoroughly familiar with the text and the layout of the letters in the copybook. If the teacher does not do this, there may be a large discrepancy in the outline of the letters in the copybook and in his sample on the board, and then the copybook, as a visual aid, will lose its meaning.
Bogolyubov N.N. Calligraphy technique
Textbook manual for teachers schools - 2nd ed., rev. and additional - Leningrad: Uchpedgiz, 1955
Unique edition. The methodology for teaching beautiful writing is described in great detail. Today, ordinary school copybooks from 1955 seem like calligraphy. Recipes are attached.

When starting the 5th edition of the Calligraphy and Office Cursive Course, the publishing house “Circle of Self-Education” left the general plan of the publication unchanged, maintaining mainly the simplicity and accessibility of the presentation. The purpose of the publication - to give everyone the opportunity to learn to write quickly and beautifully on their own in a short time - was justified by the success that befell the first four editions of the “Calligraphy Course”.
Beautiful and fluent handwriting is an urgent need of every literate person. It is necessary for teachers, officials, clerks, bank employees, clerks, draftsmen, artel workers, merchants, etc. - in a word, in very many widespread occupations. Unclear and ugly handwriting very often causes financial problems for those people who have to deal with correspondence in the service or in their business.
There is no such ugly handwriting that cannot be corrected and made beautiful. The proposed training system leads to correcting handwriting in the most correct and shortest way.
Particular attention is paid to ensuring that the student approaches the matter consciously, that is, to understand why each exercise is being done, and to see that this exercise is really necessary. With self-study, such a conscious attitude to business completely ensures success in classes.
The full course of calligraphy and office cursive is divided into six sections:
1) Preliminary exercises;
2) Calligraphic handwriting;
3) Office cursive;
4) Direct letter;
5) Rondo and Gothic;
6) Fine fonts: Batard, Frakturny, Fashionable Slavic.
For the convenience of practical training, an album of elegantly executed tables is attached to the theoretical part of the course, which contains examples of all letters, numbers and fonts.
The emergence of calligraphy dates back to ancient times.
On the most ancient Egyptian, Babylonian and Assyrian monuments there are inscriptions that show that the art of reproducing written characters was already highly developed in those distant times. In ancient China, calligraphy reached a high degree of perfection.
The written signs we currently use do not originate from Egyptian and Chinese writings, but most likely from Phoenician ones. The ancient Greeks, apparently, borrowed their alphabet from the Phoenicians and, having significantly modified it, then passed it on to the ancient Romans. Here it underwent new changes and, together with Christianity, spread almost unchanged throughout Europe. Only in Germany did medieval monks give the Latin script an angular and curly shape and develop the so-called Gothic script. The Latin script also had a strong influence on the Russian alphabet, but some of the letters of our alphabet were borrowed from Greek.
Already in ancient Greece, and then in Rome, calligraphy was held in high esteem and was very highly valued. Printing had not yet been invented at that time, and the only way to compile books was to write them on parchment. This method required great skill, since cursive writing was not yet known at that time, and the only written font was the same font that is now used in printing houses, i.e. in those days they wrote in block letters.
The heyday of calligraphy, however, dates back to the second half of the Middle Ages, when the demand for books began to increase especially quickly. During this era, fonts of amazing beauty and grace were created. Not only almost all the so-called figured fonts (Rondo, Gothic, etc.), but also many of the current typographic fonts were inherited from medieval calligraphers. In recent years, it has been possible to observe a return to medieval fonts in typography.
With the invention of printing, calligraphy lost its former importance and stopped in its development for many years. Ultimately, however, calligraphy was never supplanted, and in the last decade interest in it has been revived again, and a new period of prosperity has begun in the development of calligraphy, even more magnificent than in the Middle Ages.
The scope of calligraphy is currently extremely wide. The extraordinary development of book printing, the unprecedented growth of the newspaper business, the enormous spread of advertising, and finally the sign and poster business created a vast demand for a wide variety of curly fonts. The number of such fonts is currently already very large, but every day brings us something new in this area. Thus, having been supplanted at first by the invention of typographic fonts, calligraphy is now called to a new life by the further development of the same typographic business.
The invention of printing made a huge revolution in the book business and for the first time created the possibility of widespread literacy. Simultaneously with the spread of literacy, there arose a need for written signs that would be simpler in form than calligraphic ones and would not require either special art or a lot of time to reproduce. Having learned to read, people also wanted to be able to write, and to write easily and quickly. Curly calligraphic fonts were completely unsuitable for this purpose. It was necessary to develop a cursive font that would not be difficult to learn; it was necessary to significantly simplify the previous calligraphic fonts. This was done, but not immediately, but gradually.
Ancient cursive writing is very different from modern cursive writing. In the old days, people were in no hurry to live and in no hurry to write. Therefore, in ancient cursive writing we find an extraordinary abundance of various curls, decorations and strokes, which made writing extremely difficult and slow. Our business times have completely discarded all these calligraphic tricks and subtleties and developed a simple, economical cursive. The former cursive writing has turned in our time into the so-called calligraphic (ministerial) font, which stands on the border between truly calligraphic (curly) fonts and cursive writing.
The introduction of universal education in Europe greatly contributed to the simplification of cursive writing. In the last 20 years, teachers have devoted a lot of effort to this issue and not only introduced simplifications into cursive fonts, but also developed a method of teaching writing that gives the most accurate results in the shortest time. Following the teachers, the issue of developing handwriting was taken up by prominent scientists who, from a physiological and psychological point of view, studied the issue of the movements performed when writing. Through numerous experiments, the movements of the fingers, hand, forearm, shoulder joint and the entire arm were studied (research by Jedd, Goldscheider and Kraepelin) and the speed of writing movements in sick and healthy people was determined; the time spent on each letter of the alphabet (studies by Gross and Diehl), and the effect of alcohol on writing movements (studies by Meyer). Finally, a whole series of observations was made on the dependence of the angle of inclination of letters to the ruler on the length of the fingers and hand, as well as on the angle formed by the notebook with the edge of the table (research by Marx Lobzen).
These experiments and research are far from finished. Among teachers, for example, there is no unanimity on issues related to teaching writing: some are in favor of upright font, others are in favor of slanted font. Finally, there are serious researchers who propose some modifications to the modern cursive font (for example, shifting the pressure, changing the shape of the curvature). Among such teachers, we note Georg Lang, who wrote a large study on modern cursive writing. In general, the work of teachers over the past 20 years has eliminated many prejudices and errors from teaching writing and has opened up new ways of teaching writing.
In compiling this “Course of Calligraphy and Office Cursive Writing,” we were guided by the desire to combine into one whole all the more or less firmly established conclusions of modern scientific pedagogy.
When writing, a whole series of movements are performed - with the fingers, the hand, the forearm and the entire arm. The main requirement that any system of teaching writing must satisfy is, therefore, that it accustoms the student to free and firm writing movements, that is, to those movements that, with the least effort or muscle tension, produce the greatest result. Free and confident movements represent the basis of calligraphy and cursive writing. Handwriting cannot be free and beautiful if it is not based on free movements. That's why the development of free writing movements should be the main goal of any system of teaching writing.
From this point of view, the debate about upright and oblique writing is of secondary importance. Neither straight nor slanted handwriting contradicts the freedom of writing movements. It’s hard to even say which handwriting has more freedom of movement. Therefore, both direct and slanted writing are equally suitable. The same cannot be said about handwriting slanted to the left (and not to the right, as usual). Such an inclination most decisively contradicts the freedom of writing movements, since letters inclined to the left can be written only by unnaturally arching the right hand and placing the pen not along the paper, as usual, but across it. That is why such tortured handwriting produces an extremely unpleasant, repulsive impression.
We will have occasion to return to the issue of direct and oblique writing in the section devoted to direct writing, and there we will develop our views more fully.
In order to learn to write, you need to learn free writing movements.
Learning to write is, or more precisely should be, learning to freely write.
This is the basis of our system.
That is why it places such a prominent place on a number of exercises, the purpose of which is to develop freedom of writing movements. The student must approach these exercises with full consciousness, understand their purpose and think about the system itself. He must firmly, clearly and unswervingly remember that without freedom of writing movements he will never be able to achieve free and correct handwriting. And this freedom can only be achieved through strict implementation of the exercises we propose. That is why we analyze each exercise in the most detail and strive to ensure that, when starting it, the student clearly understands the purpose for which this exercise is given and what movements it develops.
Our course is designed not only for those people who do not yet know how to write and are just beginning to learn, but equally for those who have already learned to write, but have bad, damaged handwriting and want to correct it. For both, our exercises are equally important: the cause of bad handwriting is always unfree, incorrect, bound or unbalanced movements. Our exercises make it possible to unlearn such incorrect and unfree movements.
It is also important for students to remember that without working, nothing can be achieved. It is impossible to acquire beautiful, fluent handwriting by some miracle: you need to work for it. And working means doing all the exercises carefully and not rushing forward. Throughout the course we will tirelessly repeat: do not rush forward, otherwise you will have to go back. Remember that especially in calligraphy and cursive writing you need to adhere to the golden rule: the quieter you go, the further you will go. Move on only when you have firmly grasped the old things: the less you rush forward, the sooner and more successfully you will reach the end.
We considered it necessary not only to provide examples of exercises in our course, but also to highlight them in a special album. When teaching a course, constantly looking at the album would be burdensome. Therefore, we have included samples of our exercises in the text. On the other hand, it would also be inconvenient to use the samples included in the text when writing exercises: the book flaps easily, and it is inconvenient to place it on the table. Much greater convenience in this case is provided by a table, which is convenient to place opposite you on the table and on which there is nothing except the exercises necessary at the moment.


Old-style copybooks for the Russian, Ukrainian and Belarusian languages (narrow line, for each letter).
But enough prefaces! This page contains copybooks in the Russian language for the “first grade,” which I prepared in full accordance with my ideas about what they should be.
First of all, I returned to the frequent oblique ruler, which made life so much easier for first-graders during my childhood.
Second, the letter pattern is repeated several times on the line. After each sample there is a space where the child writes his letter. This is necessary so that the child’s field of vision is always the sample, and not his own clumsy letter, written a minute earlier.
Third, The space allocated for the child to train is not limited in any way. Even if he didn’t have enough sheet to learn how to write a letter, the exact same sheet can always be printed out again. This means that it becomes possible to formulate the task for the child in such a way that working carelessly and hastily will not make any sense. Not “write so many lines,” but “write so many beautiful letters.”
However, I don’t want to bore the reader with lengthy comments and methodological instructions. The copybooks themselves will tell about themselves more eloquently than I can.

Files for download:
- A blank sheet of paper with a ruler;
- Sample page (for quick reference);
- Samples of writing letters (alphabet);
- Copybooks (sticks, hooks and Russian letters, 73 pages);
- Ukrainian and Belarusian letters ґ, є, і, ї, ў, Ґ, Є, І.
Every day I wish the author good health when I am writing with my first-grader daughter! The tears, hysterics and hassle are over! Getting him to study is no longer a problem, the child succeeds in everything and this adds to his enthusiasm. When we practice the letter in these copybooks, the school one already writes everything correctly and beautifully. (It’s impossible to learn how to write using the Harmony program’s copybooks). Thank you very much again. Now I recommend it to everyone I know.
Thank you so much for your site! I found what I had been looking for for a long time - my own childhood copybooks, which allowed me to have good handwriting. I can’t calmly see my daughter’s handwriting; she is in 5th grade. An integral system of teaching children, which had been perfected for decades, has been destroyed; in its place, freak programs have been created, and this, unfortunately, applies not only to penmanship.
Tell me, please, in what quantity do you recommend printing each sheet? Is one copy enough? I mean, some letters (elements) are not very good, should I move on to others or should I practice writing the letter until I get a satisfactory result?
You need to practice writing every element, every letter until you get it more or less decent (although there is no need for perfectionism either). These copybooks, in my opinion, are good because each page can be printed any number of times - as many times as needed. In my experience, the most copies required are for the very first pages - those with sticks and hooks. Another interesting observation: even if a child has learned to perfectly form the “basic” hook, this does not mean that he will immediately begin to do well with the letter “i,” which consists of two identical hooks.
You recommend a special pen for writing (we found and bought it) and laminated paper, but we cannot find it on sale. Please tell me some of the most common brands of such paper, perhaps I misunderstood something...
Leonid Nekin
It’s not that I’m recommending anything, but I’m talking about my own preferences, which may turn out to be different for you - taking into account your specific situation, about which I know nothing. I once mentioned that I like the Stabilo point 88 capillary pen. As for paper, I use regular paper for inkjet and laser printers with a density of 80 grams per square meter, printing copybook files on it. For kids who are just starting to learn to write, the pen may become a little blurry on this paper because kids write the letters very slowly and often press with all their might. In my opinion, this is not a disadvantage of such paper. On the contrary, the child receives additional feedback, thanks to which he quickly learns to write correctly - so that the capillary ink does not spread. I've never tried laminated paper - I don't think it's necessary, although the ink probably won't smear on it even on a small child.
But a question arose about writing the small letter g. Is it really written that way? It always seemed to me that it simply fits into one slanted cell, but with you it fits into two.
Leonid Nekin
Maybe you are right about one cell. But according to the idea that is the basis of the copybooks, the letter “g” is not just the letter “g”, but also a basic element that is found in the writing of the letters “p”, “r” and “t” and itself, in its own right The queue is based on the hook letter "i".
Fun discovery! On the screen there are simply gaps for writing letters, and on the printed page there are thin outline letters for their subsequent tracing. Very nice and useful, thank you for your concern!!
Leonid. Thank you very much for your site, I hope that your copybooks will greatly help me improve my handwriting. I printed out a blank sheet of paper and tried to write the alphabet, it’s just super, I’ve never gotten such beautiful letters, the notebooks are just lined (as they sell now), in such a line, everything is simple and clear, how to guide the pen. I read your article about pens, bought myself based on your recommendations, and now I’ll try. It may seem strange that I am a grown girl writing copybooks, but I urgently need to improve my handwriting. I wasn’t diagnosed with it when I was a child, and I still suffer. I am a specialist with honors, I have read more than one scientific article about handwriting in elementary school. But your copybooks made the biggest contribution. Thanks a lot!
I couldn’t figure out how to make a notebook from your copybooks.
In particular, if we consider the complete copybook (there are 73 sheets), each sheet is divided by a red line, as I understand it, this is a fold line, and bending along it does not work to make a normal notebook. Also, if you just stitch all the sheets on the left side, the red line in the center won’t look very good. Maybe you have an option where the right and left parts are separated into separate sheets, or a file without a red stripe in the center.
Leonid Nekin
I had no idea that these sheets would be used to make a notebook. To begin with, there is no surer way to frighten a child than to present him with the entire volume of upcoming work at once. Further, it is not at all a fact that the child will need exactly one copy of each sheet. In my experience, in order to learn how to write more or less decently the very first sticks and hooks, several sheets are required. And in general, the whole point of these copybooks is that the sheets are printed as needed. Finally, writing on one piece of paper is simply more convenient than in a thick notebook (of 73 sheets). The red line in the middle is drawn so that the lines do not seem too long, and not in order to bend along it. Although, perhaps, you can bend it, but not in one direction so that you get a notebook, but in the other - so that you get, as it were, one small double-sided sheet.
All 4 files are printed incorrectly.
Leonid Nekin
Then the problem seems to be with your printer (perhaps an error in the program that supports it). You can try, before printing, go to the “printer properties” from the print window and change something there, for example, change the print quality to the best possible (maybe you currently have the “Draft” option selected?) . In the "advanced properties" (accessible from the Adobe Reader print window) you can try selecting "print as picture". If this is a programming error, even a small change in scale (for example, 99% or 101%) can help. As an experiment, you can also try changing the paper orientation from portrait to landscape.
If none of this helps, a radical remedy remains - convert the PDF file to some raster format, for example, TIFF or BMP (but not JPG, since this format “loses” quality).
Elena
Canon printer. I have already experimented with print quality in the printer properties - to little avail. What helped me was changing the scale and changing the paper orientation to landscape, as you suggested to me. (I definitely wouldn’t have guessed it myself). I changed two settings at once (it is quite possible that it would have been enough to adjust one thing). I am very pleased with the quality of the print. THANK YOU!!!
Everything is fine on the screen, but when printing there are no oblique lines. Printed on a laser printer.
The problem, as it turned out, was in the color. With color printing everything is fine(!), with black and white printing the oblique lines are practically invisible (barely noticeable).
In the finished “Copybooks for Beginners” the background lines are printed very poorly, both oblique and horizontal.
(No “toner saving” and “Best print quality” is set).
Leonid Nekin
Judging by what you mentioned about toner, we are talking about a black and white laser printer. It conveys the blue line in gray, or rather as individual black dots on a white background. Not too many of these points fall into the thickness of the line, which is why the line is very poorly visible. So far this has come to my mind. Every printer (especially black and white) must have somewhere in its settings the ability to display any color (including blue) in pure black. If you take advantage of this opportunity, the problem will be solved.
This is the best spelling website!
Our friend Igor Ilyin from Leningrad sent rulers for calligraphy and penmanship classes.
To work with cursive, a pdf file was generated that allows you to print different types of lines. The copybook, as you know, is used as a sample, and you can write on A4 sheets with printed lines. 5 types of ruling - 5 levels of difficulty.


Determining the correct inclination is of great importance when learning to write numbers. When writing in a cell, the slope is determined by the segment connecting the upper right corner of the cell with the middle of its lower side. Before you begin to explain how to write a number, you need to show your child a sample of it and analyze what elements the number consists of (stick, wavy line, oval, semi-oval). The demonstration of writing a number should be accompanied by brief explanations about where the line begins, in which direction it is drawn, where it ends, where the pen should be torn off the paper, and what the next line will be. The first numbers written by the child independently should be reviewed by an adult, who makes the necessary comments.
Features of writing numbers and examples of numbers
Start writing a small stick a little higher and to the right of the center of the cell, draw a line up to the upper right corner of the cell. Then write a large stick from the upper right corner almost to the middle of the bottom side of the cell.

Start writing slightly below the middle of the upper side of the cell. Draw a line up, rounding it in the upper right corner of the cell. Then draw a line down to the middle of the bottom side of the cage. Along the underside of the cage. Write a wavy line along the bottom side of the cell, leading your hand to the lower right corner of the cell.

Start writing slightly below the middle of the upper side of the cell. Draw a line up, rounding it in the upper right corner of the cell. Then they draw the line down, slightly short of the middle of the cell and write the lower semi-oval.

Start writing a little to the right of the middle of the upper side of the cell. Draw a straight line almost to the center of the cage, then draw the stick to the right and slightly short of the right side of the cage. Write with a long stick, starting above the middle of the right side of the cell and bringing it to the bottom side of the cell.

They begin to write an inclined stick slightly to the right of the middle of the upper side of the cell and lead it almost to the center of the cell. Then they write a semi-oval. A wavy line is written from the top of the stick to the right.

They begin to write a semi-oval slightly below the upper right corner of the cell, round it off, touching the top side of the cell, and move their hand down. Round the line, touching the bottom side of the cage and move your hand up. Then round the line to the left slightly above the center of the cell.

Start writing a wavy line slightly below the middle of the upper side of the cell and bring it to the upper right corner of the cell. Then they write with a large stick, bringing it almost to the middle of the bottom side of the cell, and then cross it out with a small stick in the middle.

Start writing a little lower and to the right of the middle of the upper side of the cell. Draw the line up and to the right, round it off, touching the top and right sides of the cell. Then they move their hand down, rounding the line, touching the underside of the cage. Then, rounding off, the line goes up to the starting point.

Start writing slightly below the upper right corner of the cell. In the upper right corner of the cell, the line is rounded and the hand is led down to the center of the cell. Here the line is rounded again and leads up to the beginning of the oval. Then they lead the hand down, rounding it at the middle of the bottom side of the cage.

The oval begins to be written a little to the left of the upper right corner of the cell. Draw the line down, rounding it in the middle of the bottom side of the cell. Then they lead their hand up to the beginning of the oval.
Numbers copybook
Copybooks- a wonderful idea from adults for developing children’s writing skills. You can use recipes from a very early age, starting from 3 years old.
Now you can find a huge number of copybooks. The main thing is to choose recipes for the child that are appropriate for his age. On this page you can download and print copybooks for free for children 3-4 years old, 5-6 years old (preschoolers) and first-graders.
You should not start classes right away with writing down numbers, letters and words - this is very difficult. Children aged 3-4 years will be interested in copybooks with exciting tasks for attentiveness, accuracy and coordination of movements.
These are copybooks with fairly simple figures, lines, and various curls. Let your child first practice his hand by tracing fragments of pictures, funny hooks and sticks.
The child must learn to draw various curly and continuous lines evenly and beautifully, try not to lift the pencil from the paper. It is not so easy.
Download copybooks for kids
I. Popov's recipes are perfect for kids for their very first lessons. Sticks and hooks are built into the copybook designs. First you can color the drawing, and then move on to the “lowercase letter”.
Download copybook for boys

Fun copybooks for children 5-6 years old
For children 5-6 years old, take copybooks with more difficult tasks. Using such copybooks, your child will learn to carefully trace dotted lines, master the first skills of writing and drawing, and gain dexterity when working with a pen and pencil.
Download copybooks for children 5-6 years old

Download funny copybooks for preschoolers
Copybooks for a preschooler will prepare the child for writing, introduce him to the configuration of the letters of the Russian alphabet, and teach him to write letters in cursive. Use these copybooks and your child will quickly remember the name and spelling of letters.
Download copybook - alphabet for preschoolers

Math worksheets with numbers and problems will help your child learn to write numbers correctly and become familiar with counting. By clicking on the link, you can download several types of math copybooks quickly and for free
Download copybooks with numbers

Copybooks for schoolchildren
It will take a child a lot of time to develop beautiful handwriting. But now at school very little attention is paid to the correct and calligraphic writing of letters and numbers. Therefore, you can print out copybooks with the alphabet for schoolchildren and study additionally. These copybooks, without pictures, are aimed at more serious work on teaching writing. In addition to the letters themselves, there are also individual elements of letters in the copybooks.
Download the copybook for schoolchildren "Alphabet in cursive"


You might also be interested in:

Greetings to all the many readers of the site! Today we will analyze very...
Greetings to all the many readers of the site! Today we will analyze very...

One of the worst nightmares of all car enthusiasts. But this plot is not directly related to...

Collection of dream books Why do you dream of Parting in a dream according to 10 dream books? Below you can...

WILLIAMS CREATIVITY TEST The Williams test is designed for comprehensive diagnostics...

